Ergonomic Home Office Checklist – The Short Answer
A well-built ergonomic home office checklist covers your chair height, monitor position, keyboard and mouse placement, lighting, and movement breaks – and when you get all five areas right, most people notice less neck tension and fatigue within a week or two. You do not need expensive equipment to start; small, free adjustments often deliver the biggest early wins. I have found that going through a simple checklist once a month keeps everything dialed in as my habits and furniture shift over time.
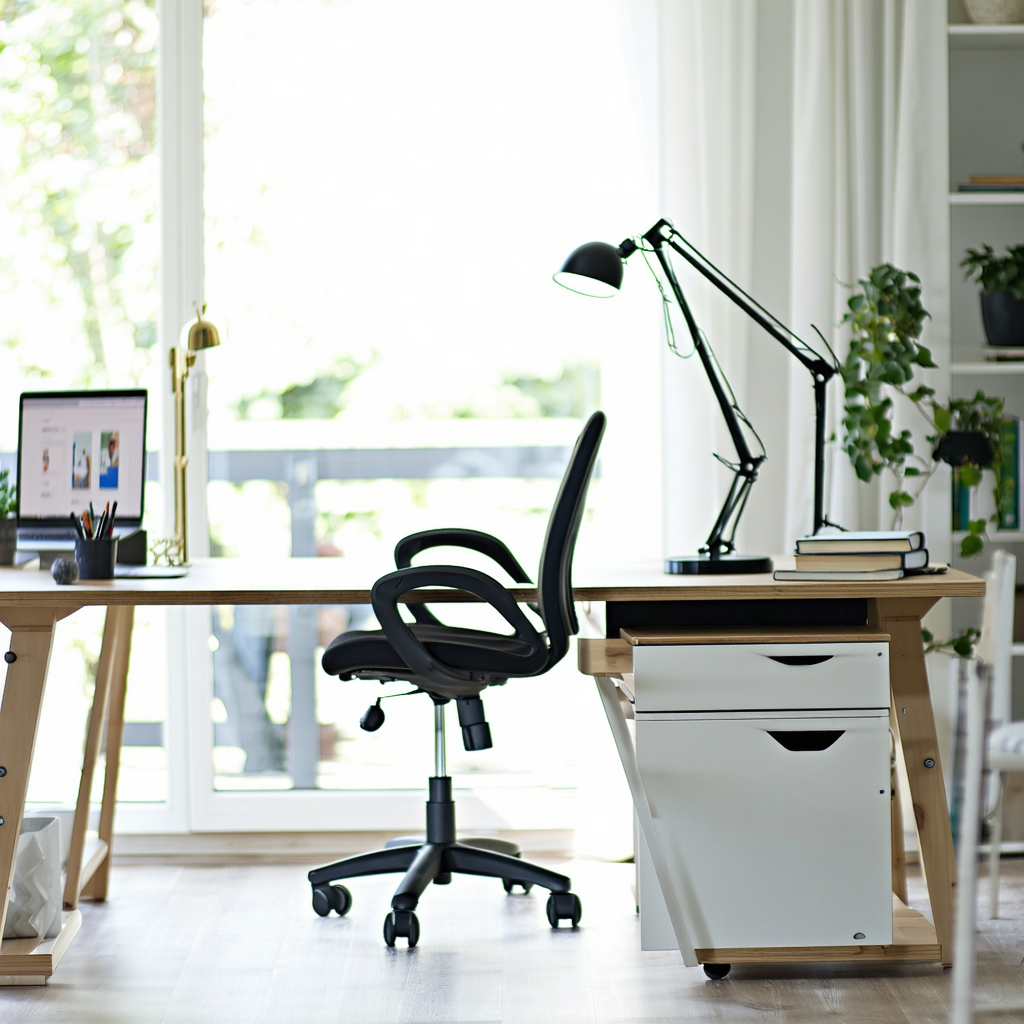
Table of Contents
- Why home office ergonomics matters
- Before you start – a quick self-assessment
- Chair and seating setup
- Desk and surface height
- Monitor and screen position
- Keyboard and mouse placement
- Lighting and glare control
- Movement, breaks, and micropauses
- Helpful accessories worth considering
- The full ergonomic home office checklist
- Frequently asked questions
Why Home Office Ergonomics Matters
Poor posture and awkward workstation setups are linked to musculoskeletal discomfort, eye strain, and reduced concentration. The National Institute for Occupational Safety and Health (NIOSH) notes that ergonomic risk factors – including awkward postures, repetitive motion, and contact stress – contribute significantly to work-related musculoskeletal disorders.
Home offices often create unique challenges that a traditional office environment does not. Kitchen chairs, coffee tables, and laptop screens at the wrong height are common culprits. Running through a solid ergonomic home office checklist helps you spot and fix these issues before they become chronic habits.
Before You Start – A Quick Self-Assessment
Before diving into the ergonomic home office checklist items, spend two minutes noticing where your body actually hurts or feels tight after a typical workday. This personal map is more useful than any generic advice.
Common warning signs that your setup needs attention include:
- Neck stiffness or upper back tension by mid-afternoon
- Wrist aching or tingling after typing sessions
- Dry or tired eyes, especially on video calls
- Lower back discomfort when you stand up from your desk
- Headaches that start after a few hours of screen time
Write down which of these apply to you. As you work through each section below, you will see which checklist items are likely to help most in your specific case.
Chair and Seating Setup
Why the chair is your foundation
Your chair is the single most important piece of equipment in any ergonomic home office checklist. Everything else – monitor height, keyboard angle, lighting – is calibrated relative to how you sit. Getting the chair right first makes every other adjustment easier and more accurate.
Chair height
Set your chair height so your feet rest flat on the floor and your knees are at roughly a 90-degree angle, or very slightly open (about 100-110 degrees). If your feet dangle, use a footrest – a thick book works fine as a starting point.
Your thighs should be roughly parallel to the floor with no hard edge pressing into the back of your thighs. If the seat pan is too deep for your legs, roll up a small towel and place it behind your lower back to bring you forward.
Lumbar support and backrest
The lumbar support should sit in the natural inward curve of your lower back – usually around the belt-line area. If your chair has no lumbar support, a rolled hand towel or a small cushion placed at that curve does a surprisingly good job.
Lean back slightly into the backrest rather than perching forward. I used to sit on the front edge of my chair thinking it kept me alert, but it actually fatigued my back muscles far faster than resting against a supported backrest.
Armrests
Armrests should support your forearms lightly without forcing your shoulders up toward your ears. If they are too high, remove them or lower them. If they prevent you from rolling close enough to your desk, consider folding them down or removing them entirely.
Desk and Surface Height
Finding the right desk height
With your chair correctly set, your desk surface should allow your elbows to rest at approximately 90 degrees when your hands are on the keyboard. Your shoulders should feel relaxed – not hunched up or pulled down.
Standard desks are built for a person around 5 feet 9 inches tall. If you are shorter or taller, you will likely need to adjust your chair height and compensate with a footrest, or look at a desk riser or height-adjustable desk over time.
Standing desk considerations
A height-adjustable or standing desk is a worthwhile long-term investment for many people. When standing, your elbows should still be at roughly 90 degrees, your monitor at eye level, and your weight distributed evenly – not locked in the knees.
Some people find that alternating between sitting and standing every 30-60 minutes may support energy levels and reduce lower back discomfort. An anti-fatigue mat makes standing for longer periods noticeably more comfortable.
Desk clutter and arm reach
Keep frequently used items – your mouse, a notepad, your water bottle – within easy reach so you are not twisting or stretching repeatedly. Items you rarely use can live further away. A tidy desk surface also reduces visual clutter, which some people find genuinely reduces cognitive fatigue.
Monitor and Screen Position
Height and distance
Monitor position is one of the most commonly misconfigured items on any ergonomic home office checklist. The top of your monitor should be at or very slightly below eye level. Your eyes naturally look slightly downward when relaxed, so this position lets your neck stay in a neutral, unstressed alignment.
The screen should sit roughly an arm’s length away – about 50 to 70 centimeters (20 to 28 inches) from your eyes. If you find yourself leaning forward to read, increase the font size rather than moving the screen closer.
Laptop users
A laptop used directly on a desk almost always places the screen too low and forces you to round your upper back and neck. Raising the laptop on a stand and using a separate keyboard and mouse is one of the highest-impact changes you can make for under $30.
This single adjustment transformed my own setup. Before I added a laptop stand, I had daily tension headaches by 3 PM. Within a few days of raising the screen, those headaches dropped significantly in frequency.
Dual monitors
If you use two monitors equally, center them both in front of you and angle them inward slightly. If one is a primary and one is secondary, place the primary directly in front and the secondary off to the side at the same height. Avoid placing a secondary monitor so far to the side that you are constantly rotating your neck to check it.
Screen tilt
Tilt the monitor back very slightly – about 10 to 20 degrees – so the top of the screen is fractionally further away than the bottom. This small tilt reduces neck extension and makes the screen easier to read without leaning in.
Keyboard and Mouse Placement
Keyboard position
Your keyboard should sit close enough to your body that your elbows stay near your sides – not reaching forward. Your wrists should be roughly flat or very slightly downward (negative tilt) when typing, not bent upward.
A keyboard tray that drops the keyboard slightly below desk level can help achieve this neutral wrist position, especially on taller desks. Many people find this a genuine game-changer for wrist comfort.
Mouse placement
Keep your mouse on the same surface level as your keyboard and as close to it as possible. Reaching out wide to use a mouse places sustained load on your shoulder and upper arm. A compact keyboard without a number pad on the right side naturally brings the mouse closer to your body’s centerline.
Wrist rests – use with care
Wrist rests are useful during pauses in typing – not while actively typing. Using a wrist rest while typing can actually increase pressure on the carpal tunnel. Rest your palms on it between bursts of typing, then lift your hands to type freely.
Lighting and Glare Control
Natural light positioning
Position your desk so windows are to the side of your monitor rather than directly behind or in front of it. A window behind you creates glare on your screen; a window directly in front of you creates uncomfortable contrast between the bright background and your screen.
Side lighting is the sweet spot. It provides good ambient brightness without creating problematic glare or silhouetting your screen.
Ambient and task lighting
The room’s ambient light should be bright enough that your screen does not feel like the only light source in the room – this contrast strains your eyes. A simple desk lamp aimed at your work surface (not your screen) adds useful task lighting without adding glare.
Bias lighting – a soft light source placed behind your monitor – is a technique borrowed from video editing that some people find reduces eye fatigue noticeably. An inexpensive LED strip behind the monitor achieves this effect.
Screen brightness and blue light
Match your screen brightness to the ambient light level in your room. A very bright screen in a dim room creates uncomfortable contrast. Many people find that enabling a warm color temperature (sometimes called “night mode” or a similar setting) in the afternoon and evening hours may support better sleep quality, though individual responses vary.
Movement, Breaks, and Micropauses
Why movement is part of the checklist
Even a perfectly configured ergonomic home office setup cannot compensate for sitting still for hours at a time. Static postures – even good ones – reduce circulation and increase muscle fatigue. Movement is a non-negotiable part of any complete ergonomic home office checklist.
The 20-20-20 rule for eyes
Every 20 minutes, look at something at least 20 feet away for at least 20 seconds. This simple habit relaxes the ciliary muscles in your eyes that work hard to focus on a close screen. Setting a quiet timer or using a browser extension to prompt this reminder makes it easy to build into your routine.
Movement break frequency
Standing up, stretching, or walking briefly every 30 to 60 minutes is a practical target for most people. You do not need a formal exercise routine – standing to refill a water glass, walking to another room, or doing a few shoulder rolls counts.
Some people find the Pomodoro technique – 25 minutes of focused work, 5-minute break – naturally aligns with healthy movement frequency. The break serves both cognitive and physical recovery at the same time.
Micropauses
A micropause is a 10 to 30-second pause where you drop your hands from the keyboard, relax your shoulders, and let your eyes go soft. These tiny resets throughout the day may reduce cumulative muscle tension more than people expect. I try to take one every time I finish a paragraph or complete a task.
Helpful Accessories Worth Considering
You do not need to buy everything at once. Here is a practical priority order based on common impact:
- Laptop stand – High impact, low cost. Often the single best first purchase for laptop users.
- External keyboard and mouse – Essential if you use a laptop stand, and useful for desktop users wanting a better layout.
- Monitor riser or adjustable arm – Helps get screen height exactly right and frees up desk space.
- Lumbar support cushion – Good bridge solution if you cannot replace a poor chair immediately.
- Footrest – Important for shorter users or anyone with a fixed-height desk that is slightly too tall.
- Anti-fatigue mat – Worth having if you use a standing desk for more than 30 minutes at a time.
- Document holder – Positions reference documents at screen height to reduce neck rotation and looking down.
- Headset or speakerphone – Eliminates neck-cradling a phone handset, which is a surprisingly common source of neck pain for people on frequent calls.
The Full Ergonomic Home Office Checklist
Use this ergonomic home office checklist as a monthly review. Work through each item and mark it as done, needs adjustment, or not applicable to your setup.
Chair and seating
- Feet flat on the floor or on a footrest
- Knees at 90-110 degrees, no hard pressure on the back of thighs
- Lumbar support sitting in the natural curve of the lower back
- Backrest used – not perching on the seat edge
- Armrests at elbow height or removed if they push shoulders up
Desk and surface
- Elbows at approximately 90 degrees when hands are on the keyboard
- Shoulders relaxed – not raised or pulled forward
- Frequently used items within easy reach without twisting
- Desk surface clear enough to allow free arm movement
Monitor and screen
- Top of screen at or slightly below eye level
- Screen 50-70 cm from eyes
- No direct window glare on screen
- Screen tilt adjusted (top slightly further away than bottom)
- Laptop raised on a stand with external keyboard and mouse
Keyboard and mouse
- Keyboard close to body – elbows stay near sides while typing
- Wrists flat or slightly downward while typing
- Mouse on the same level as keyboard and close to it
- Wrist rest used only during pauses, not while actively typing
Lighting
- Window positioned to the side – not behind or in front of monitor
- Room ambient light bright enough to reduce screen contrast
- Screen brightness matched to room lighting
- Warm color temperature enabled for afternoon and evening use
Movement and habits
- 20-20-20 rule practiced throughout the day
- Standing or moving briefly every 30-60 minutes
- Micropauses taken between tasks
- Water bottle within reach to encourage regular standing
Frequently Asked Questions
What is an ergonomic home office checklist and why do I need one?
An ergonomic home office checklist is a structured list of workstation setup items – covering your chair, desk, monitor, keyboard, lighting, and movement habits – that you review to make sure your workspace supports comfortable, sustainable work. Most people set up their home office once and never revisit it, which means small problems compound over months. A checklist gives you a repeatable way to catch and fix issues before they cause chronic discomfort.
How often should I go through an ergonomic home office checklist?
A monthly review works well for most people. Your setup can drift over time – a chair gets adjusted by someone else, a new monitor arrives at a different height, or you start working longer hours and need to revisit your break habits. A quick 10-minute check once a month keeps everything aligned without becoming a chore.
Can I build an ergonomic home office on a tight budget?
Yes. Many of the highest-impact changes are free – adjusting your chair height, repositioning your monitor, moving your desk relative to a window. The first paid upgrade that delivers the most value for most laptop users is a laptop stand combined with an external keyboard and mouse, which can cost as little as $25-40 total. You do not need a $1,000 chair to have a well-configured ergonomic workspace.
What is the most common ergonomic mistake people make in a home office?
Using a laptop directly on a desk without raising the screen is probably the most common and impactful mistake. It forces the neck to bend forward and downward for hours at a time, which places significant load on the cervical spine and upper back muscles. Raising the screen to eye level with a stand – and using a separate keyboard – addresses this immediately.
Does an ergonomic home office setup help with headaches?
Some people find that correcting monitor height, reducing screen glare, and improving lighting may support a reduction in tension-type headaches related to eye strain and neck posture. This is not a guarantee, and headaches have many possible causes. If headaches are persistent or severe, speaking with a healthcare professional is the right step – but improving your ergonomic setup is a reasonable, low-risk place to start.
Is sitting or standing better for a home office?
Neither prolonged sitting nor prolonged standing is ideal on its own. The evidence generally supports alternating between the two throughout the day as the most comfortable and sustainable approach. If you have a height-adjustable desk, moving between sitting and standing every 30-60 minutes is a practical target. If you only have a seated setup, prioritizing frequent short movement breaks is the next best option.
How do I know if my chair is ergonomic enough?
A chair does not need to be labeled “ergonomic” to work well. What matters is whether it can be adjusted to support the key positions described in this ergonomic home office checklist – feet flat, knees at 90-110 degrees, lumbar support in the right place, and elbows near desk height. A basic adjustable office chair that meets these criteria will serve you better than an expensive chair that is not adjusted correctly for your body.
For more practical wellness ideas, browse the Health Living Today guide library.